

Below is a guide for setting up the Facebook Business Manager for PIC clients! Here you will find what steps and information are needed from both PIC team members and from client representatives to get FBM up and running.
Creating Business Manager
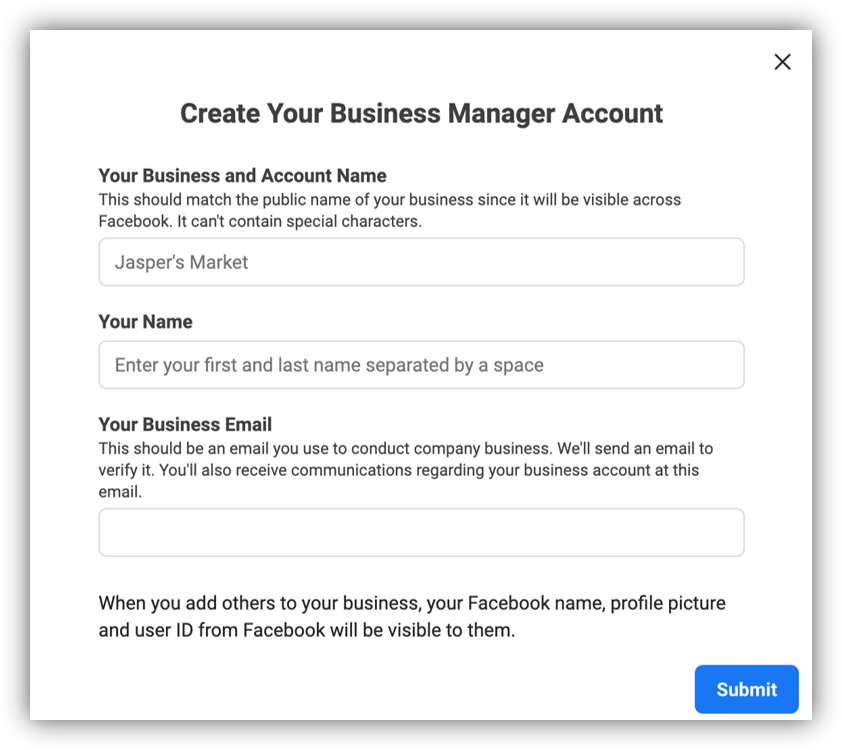
- Go to: business.facebook.com/overview
- Click “Create Account”
- Enter all information needed including
a) Business Name
b) Your Name
c) Business Email - Click “Submit”
You will be sent an email that you need to confirm to receive full access to the newly created account.
Add Business Page
Once you click the link in your email to confirm your email address, you will be sent back to the Business Manager.
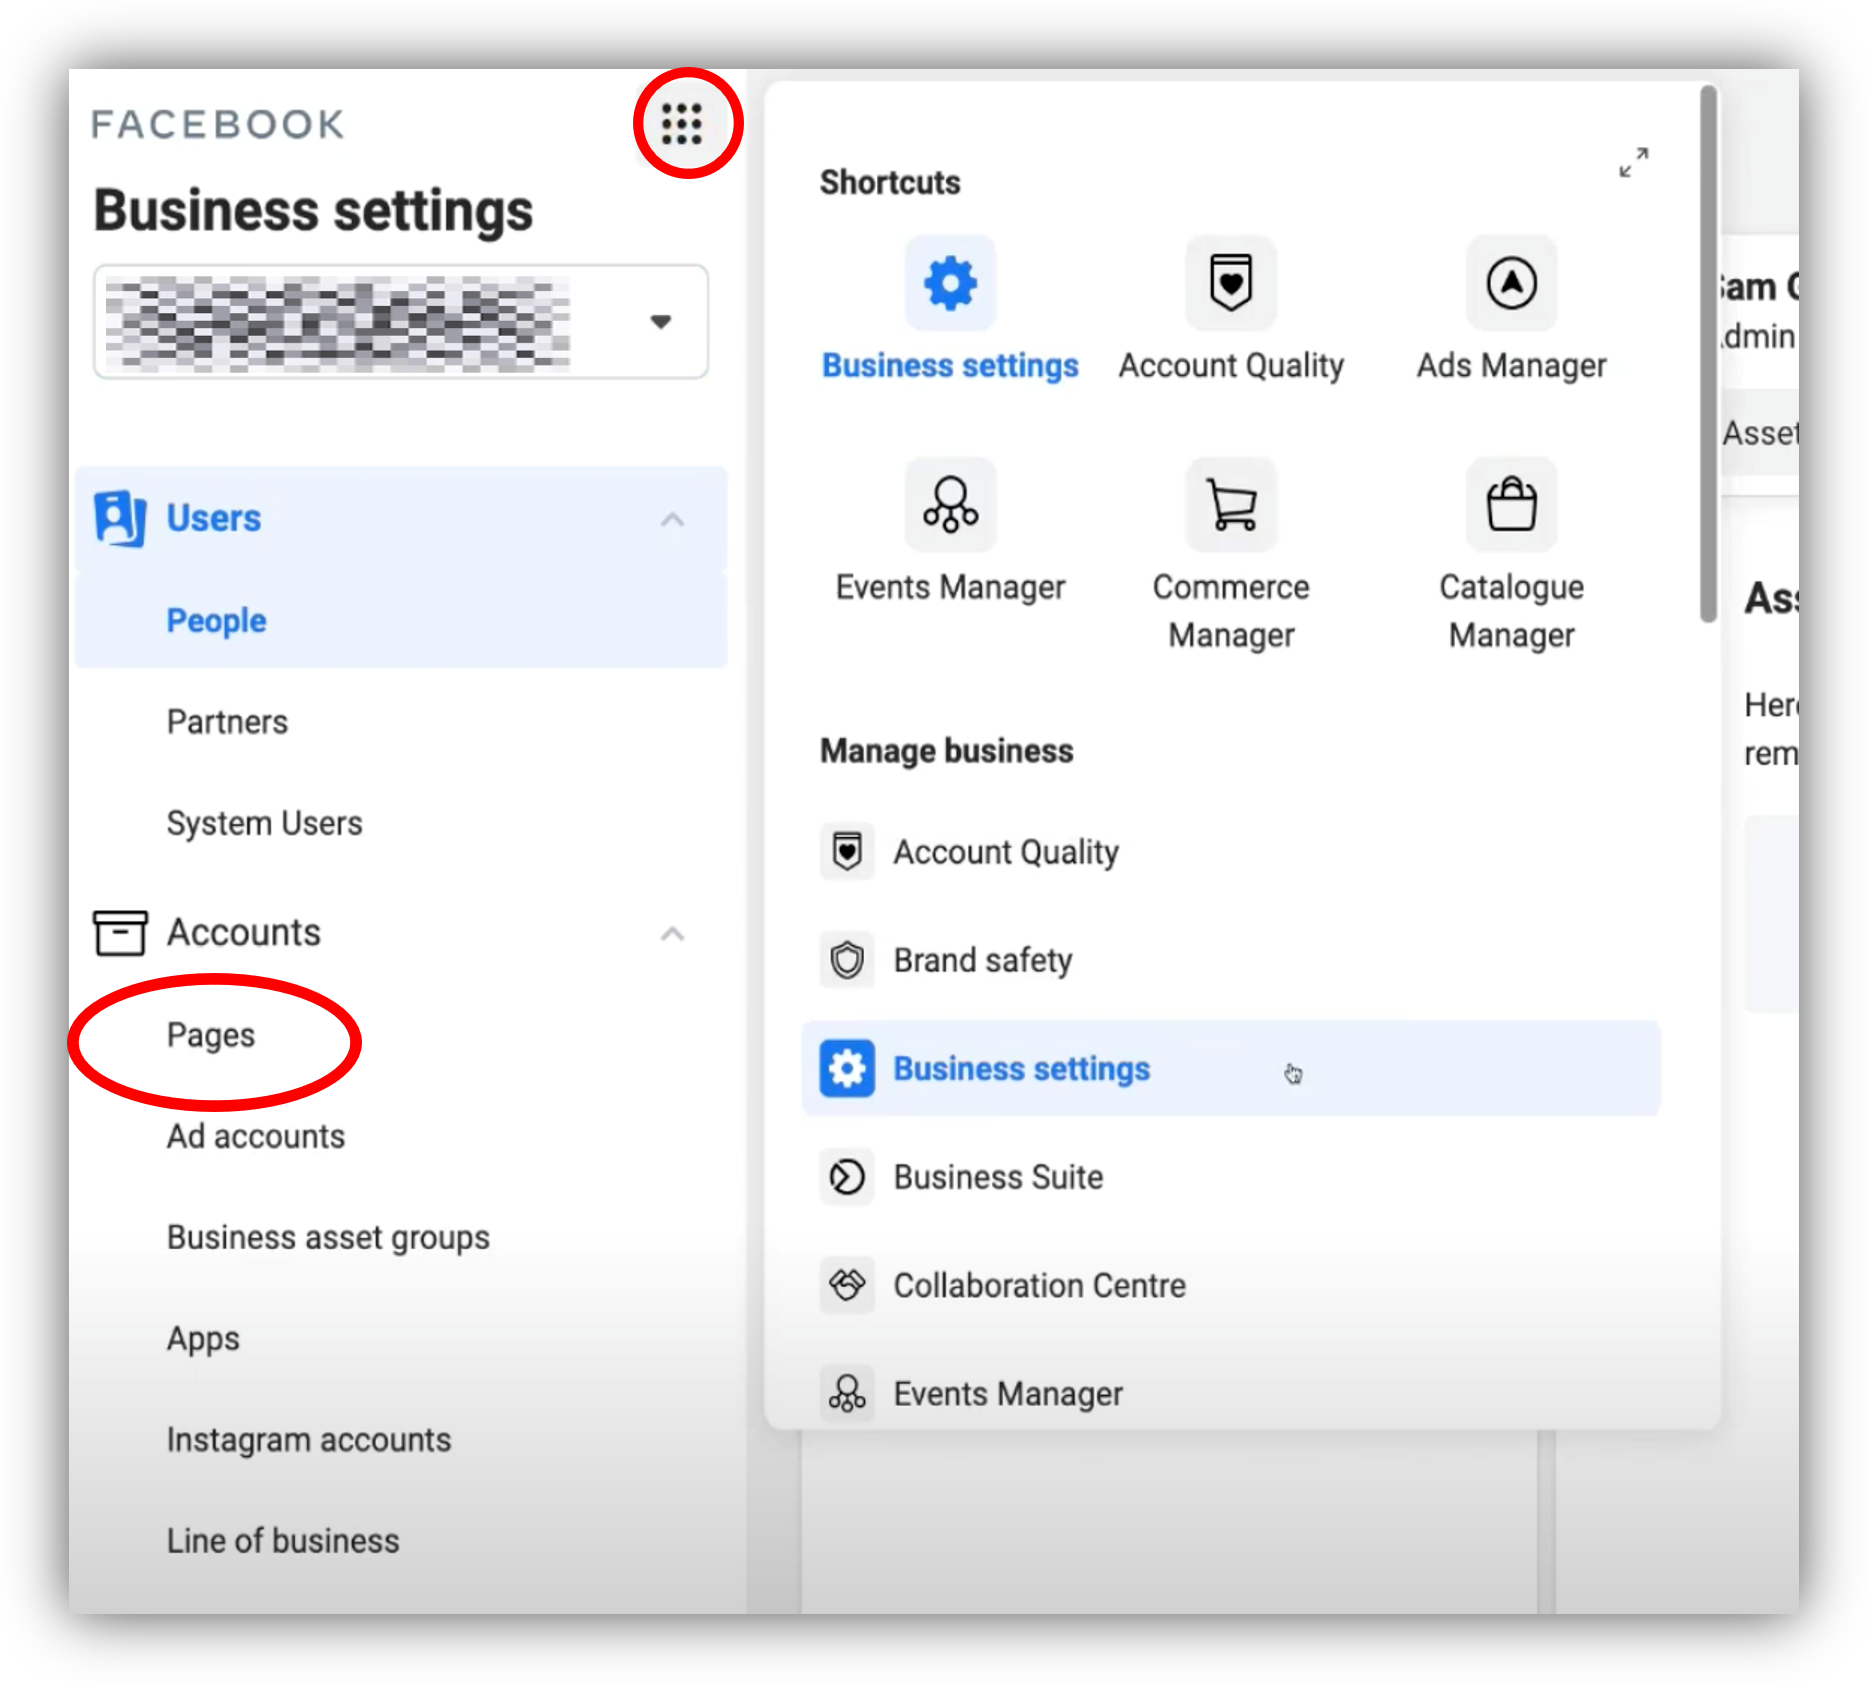
- Go to “Business Settings” by clicking the button that looks like a square of dots, and click “Business Settings”
- Navigate to “Pages” on the left side of the page
- Click “Add”
- Type in your business page and select it from the drop down
- Click “Add Page”
- Once selected, you’ll get a confirmation saying your request has been approved
Add Users
Now that you have created your account, you have Admin access which allows you to grant others access to your assets within Business Manager.

- Click “People” on the left menu bar
- Click “Add”
- Enter the email of the person you want to invite and select if you want to give that user “Employee Access” or “Admin Access”
For the PIC team, we need “Admin Access” selected
Use pghinternetconsulting@gmail.com
Verify Your Business
You will also need to verify your business to secure your standing with Facebook as a real-life business.
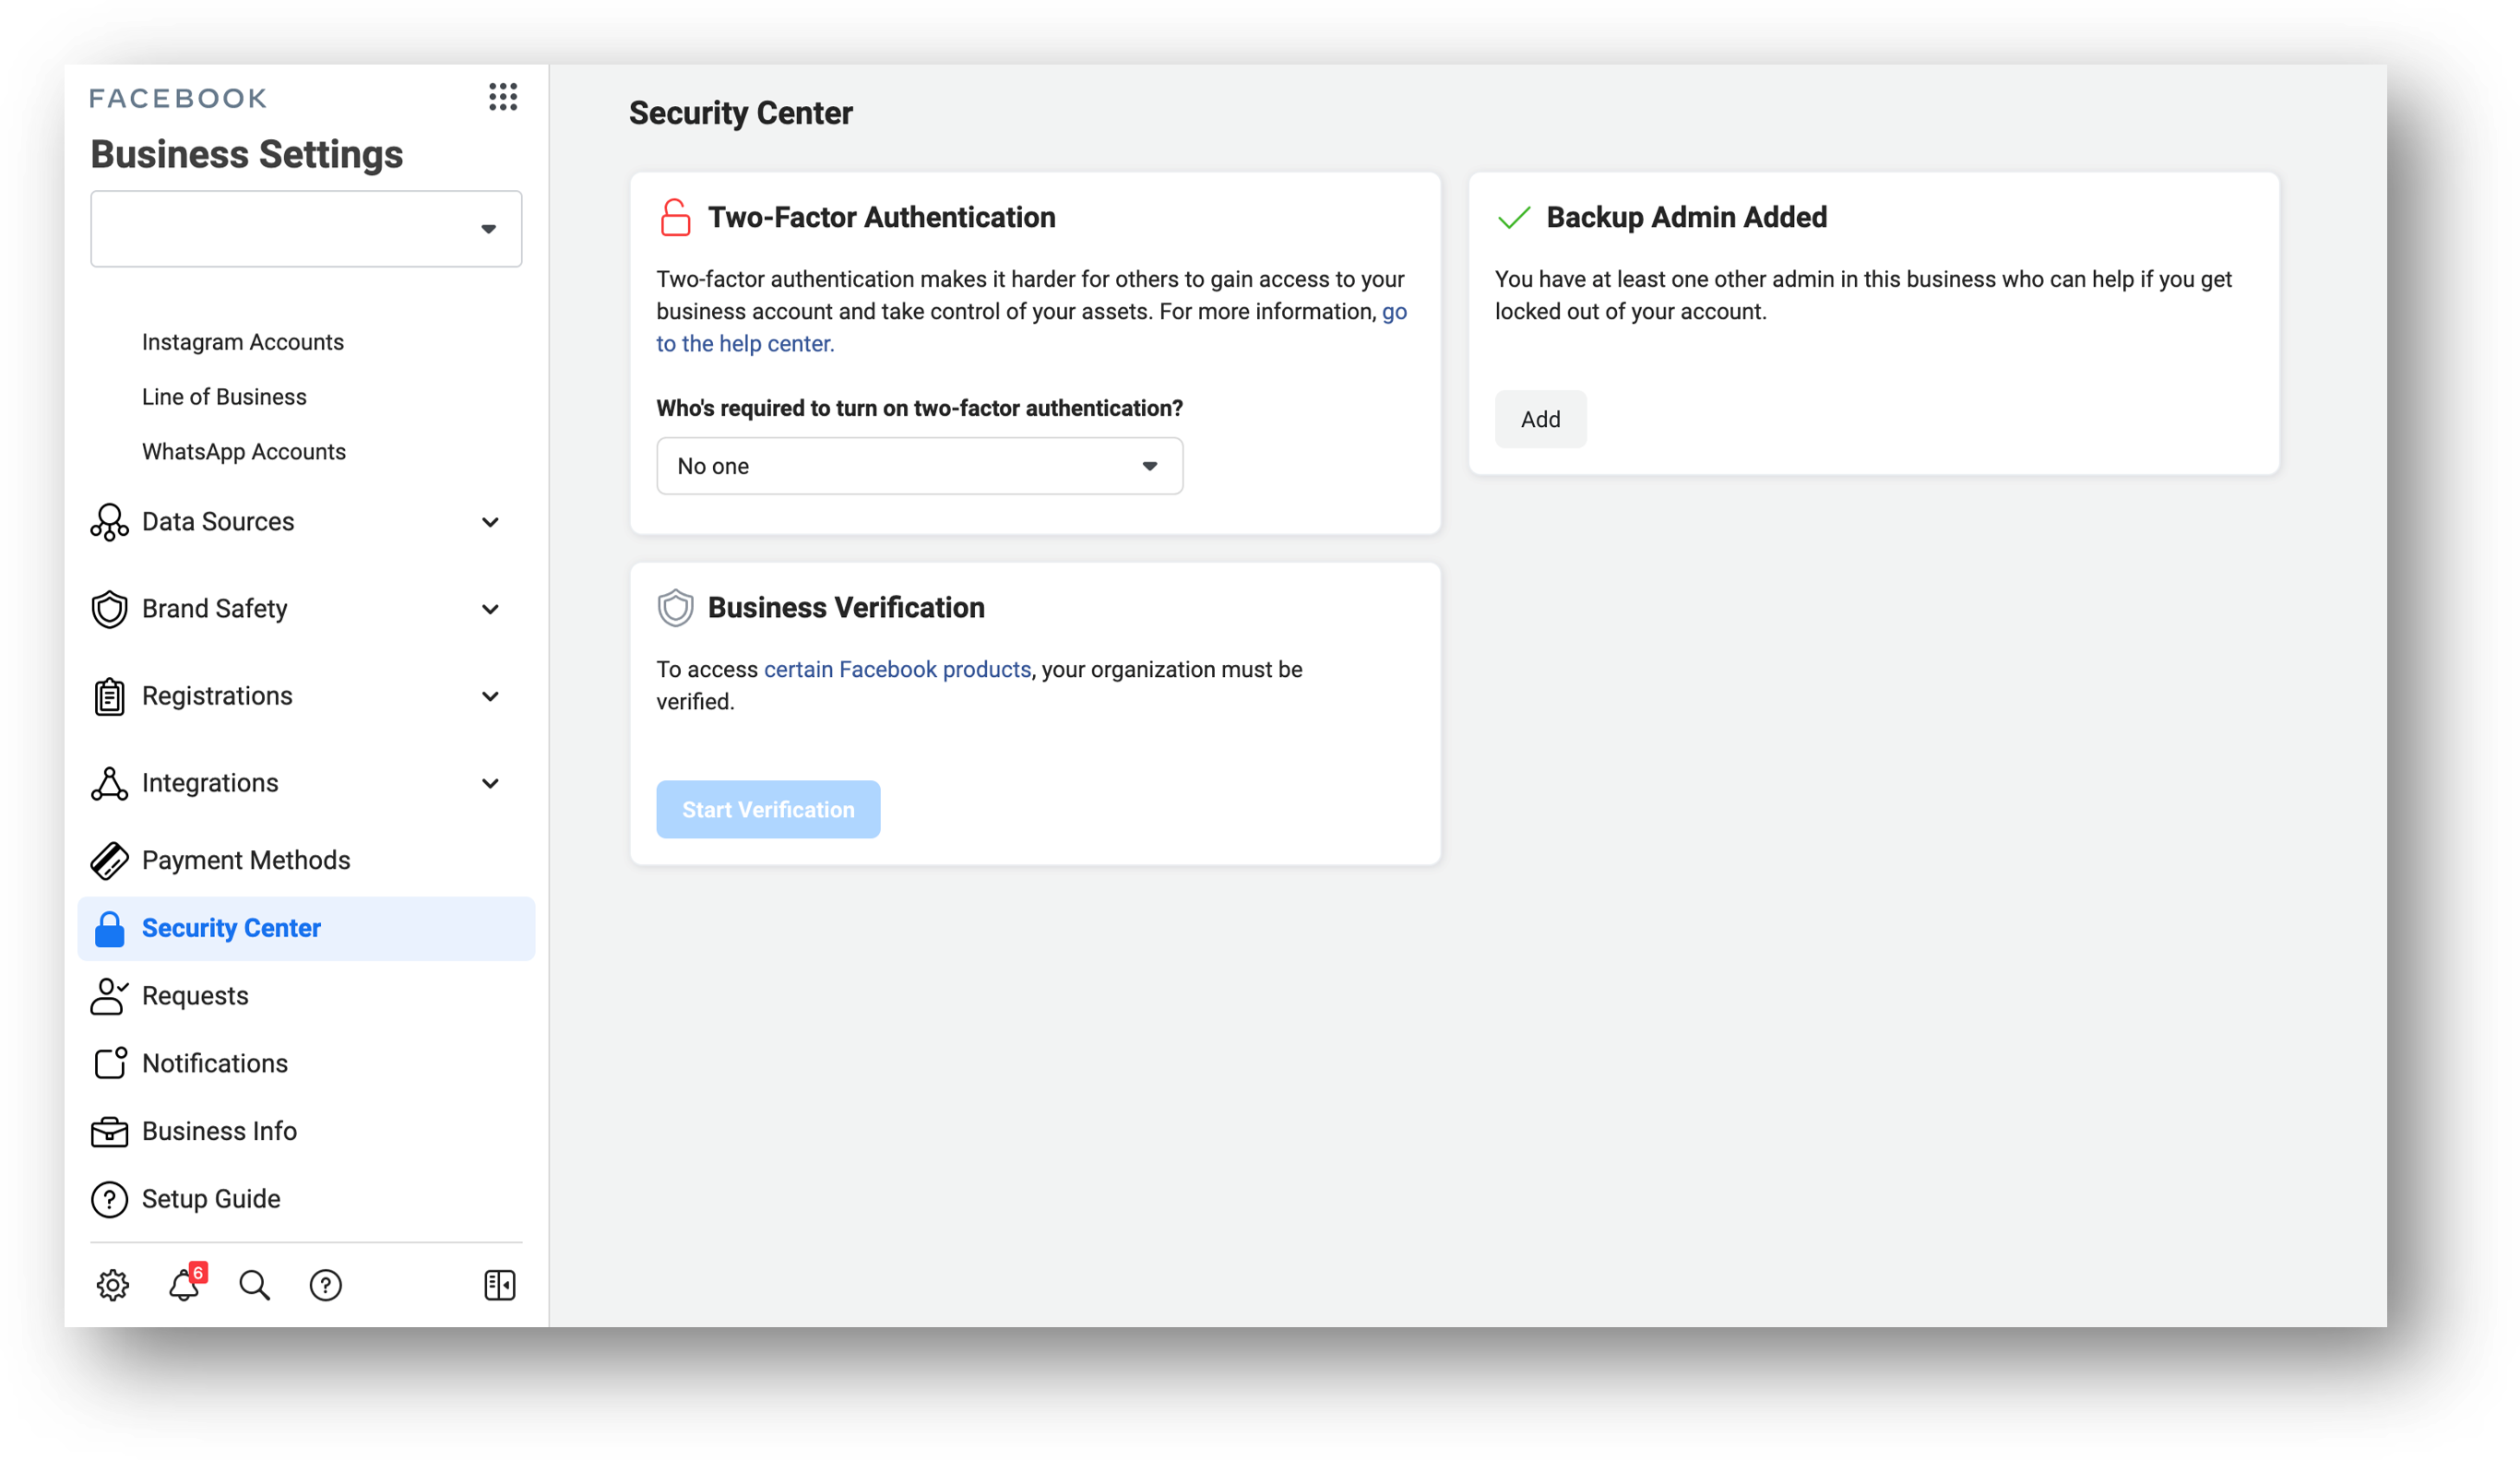
- While in Business Settings, scroll down and click “Security Center”
- Under Business Verification, click “Start Verification” to start the process
- Once here, you will need to confirm your identity and enter your business’ details. Select “Next”.
- Select your business from the list and confirm all details.
- Choose how you want to verify – via call, text, or email. You will receive a code.
- Enter the verification code and click “Submit”
Once the review is complete, you will receive a notification that your business is verified.
Add Meta Pixel
The Meta Pixel is a piece of code that you put on your website to help measure advertising effectiveness.
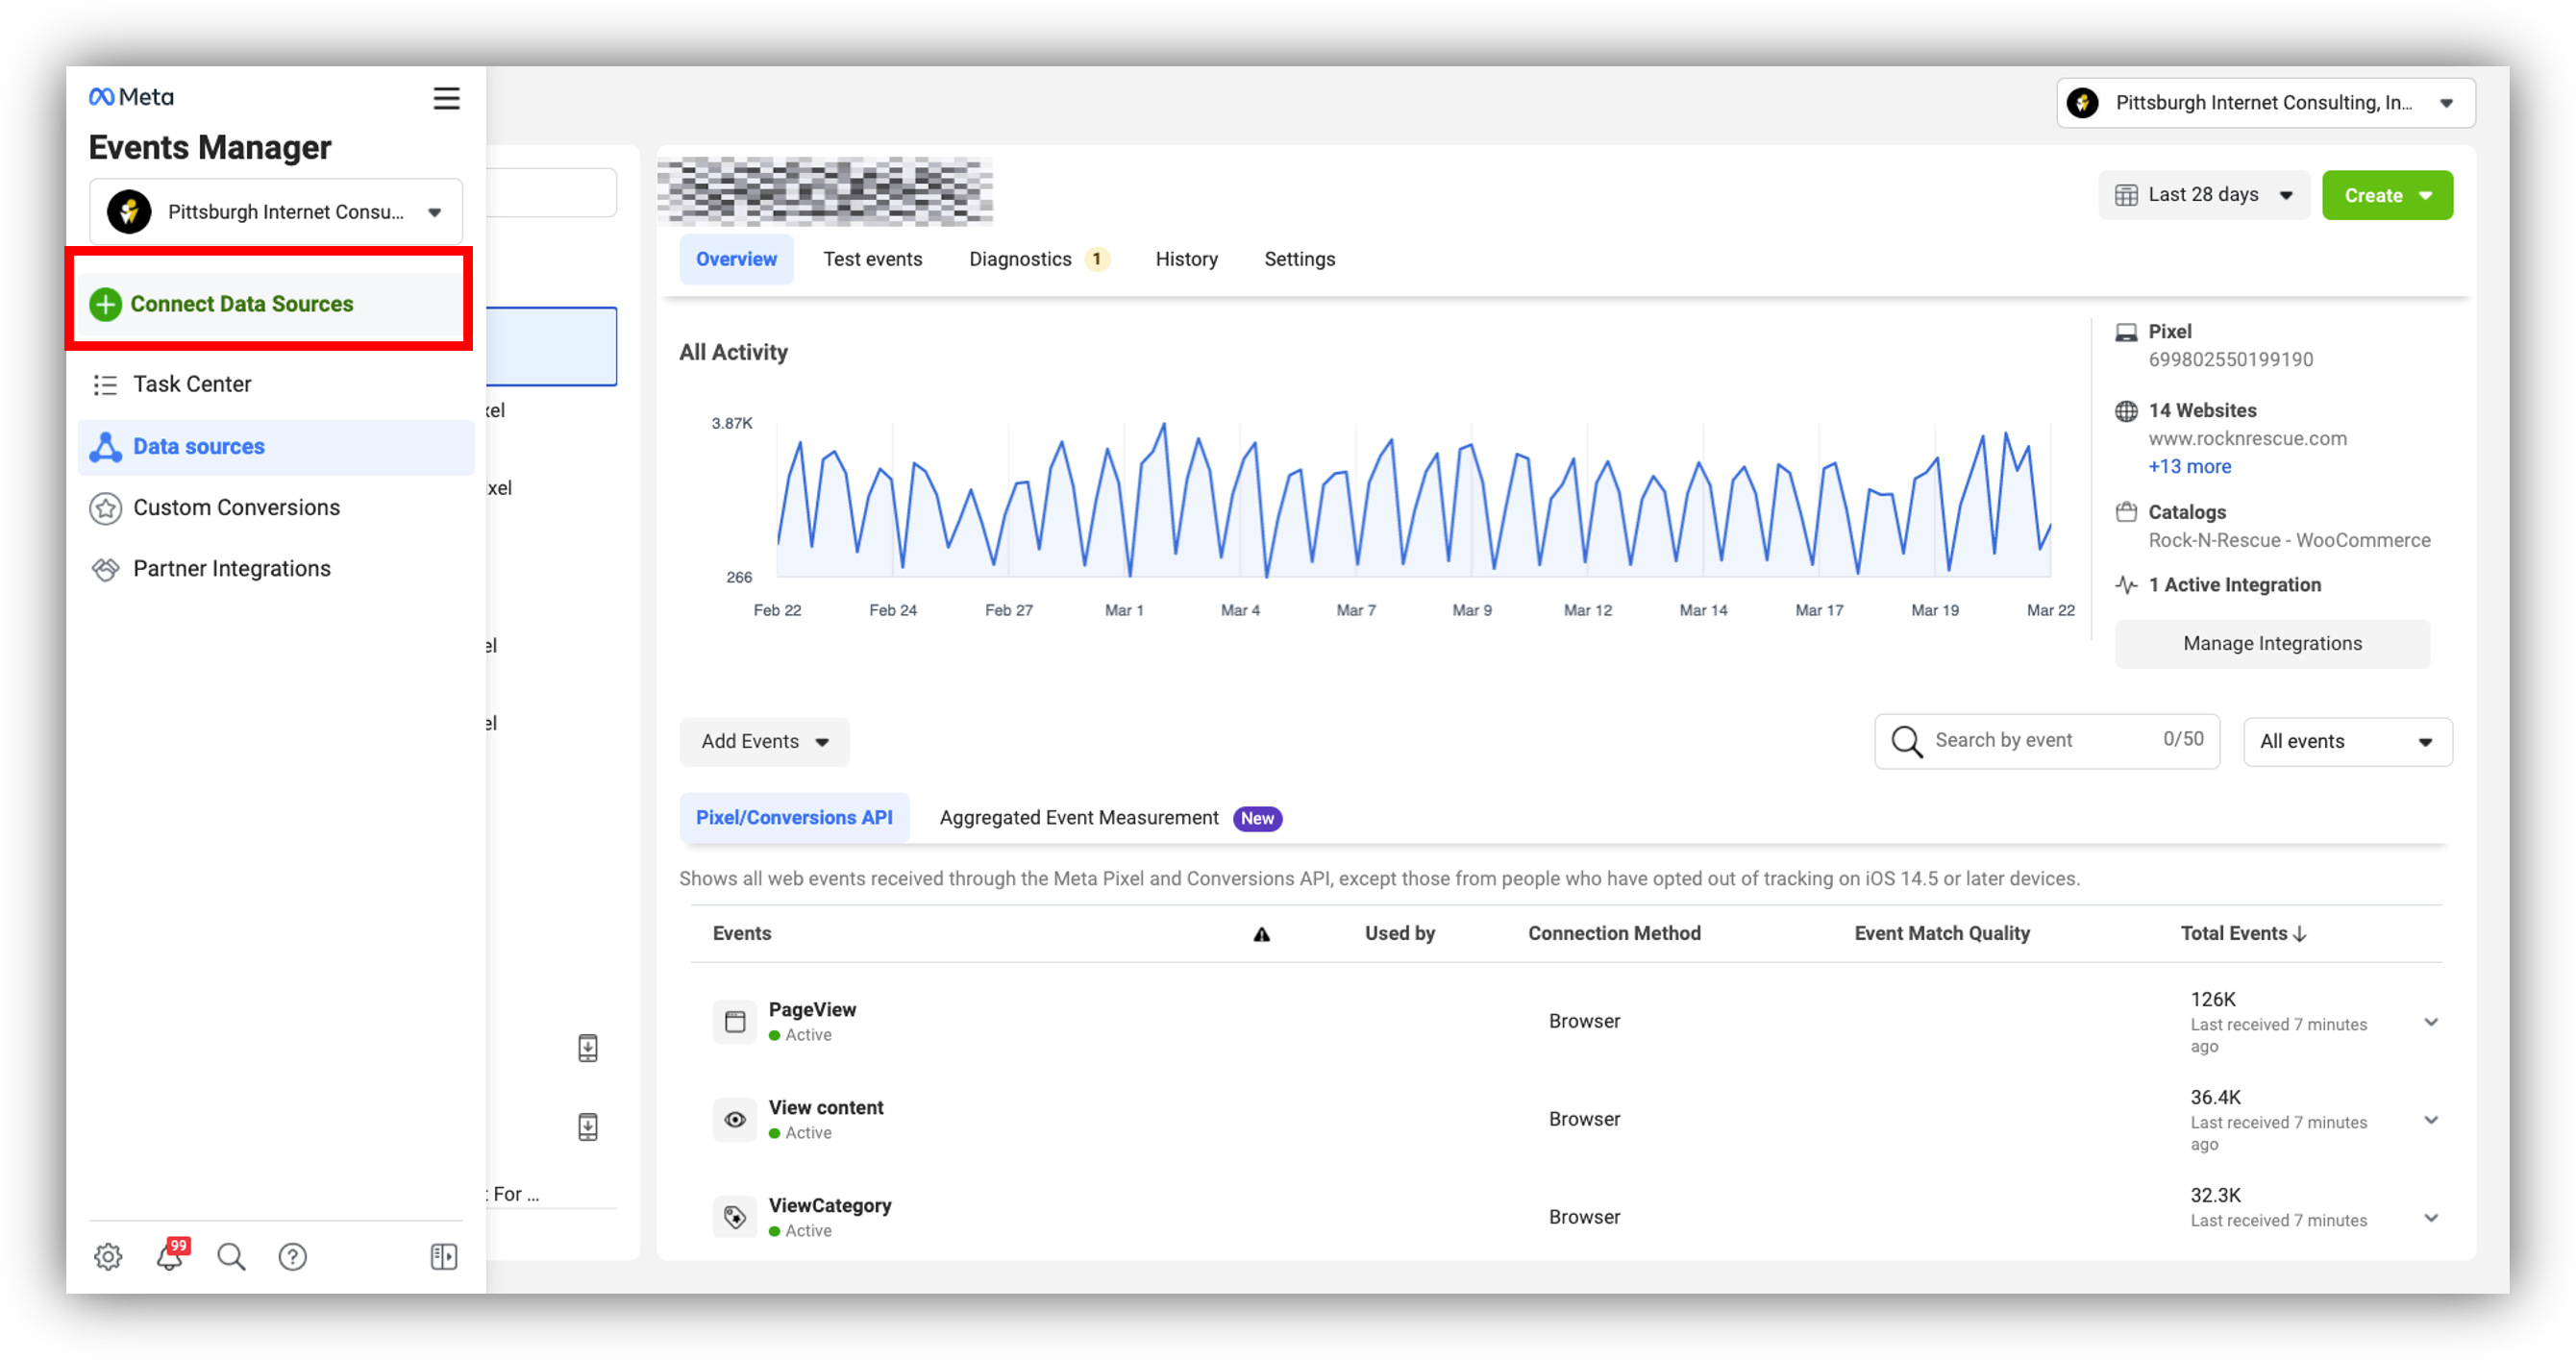
- Go to Events Manager
- Click “Connect Data Sources” and select “Web”
- Select “Meta Pixel” and click “Connect”
- Enter your Pixel Name and click “Continue”
- Install the Pixel on your website using either of these methods:
a) Found under the section Manually add Pixel code to website
b) Found under the section Use a partner integration
Facebook Catalog
Your catalog is a container that holds information about all the items you want to advertise or sell on Facebook and Instagram.
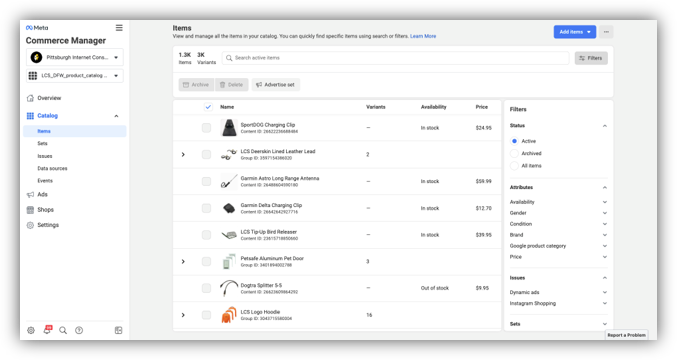
- Go to Commerce Manager
- Click “Get Started” and select “Create a Catalog”
- Select the type of inventory you sell and click “Next”
- Choose your upload method
a) Upload product info – add items manually or use your Meta Pixel
b) Connect a partner platform – automatically import items using platforms like Shopify or WooCommerce - Enter you Catalog Name and click “Create”
Once your catalog is created, you will need to upload products using one of these methods: manual, data feed, or Meta Pixel
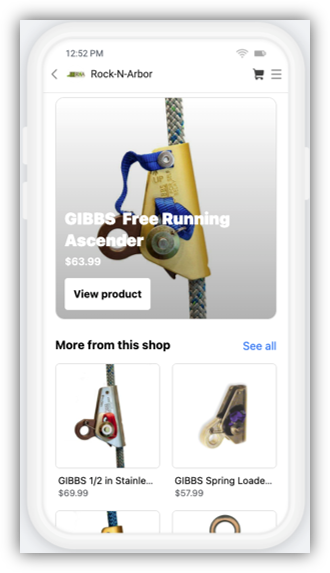
Facebook Shop
With Shops, you can display and sell products on Facebook and Instagram.
- Go to Create Your Shop and click “Next”
- Choose “Checkout on your website”
- Choose your business’ FB page and IG account to connect your shop with those pages / account
- Select your Business Manager from the list and click “Next”
- Select the Catalog that was just created and click “Next”
- Review your shop details and click “Finish Setup”
- Publish you shop
After you publish you shop, it will go through a review process. This can take up to 4 weeks to complete but in most cases it will take around 1 to 2 weeks.
Congratulations! Facebook Business Manager is ready to go!