

Step 1 : Sign in to the AWS Management and open the Amazon S3 -> https://console.aws.amazon.com/s3/
Step 2 : Click on Create bucket.

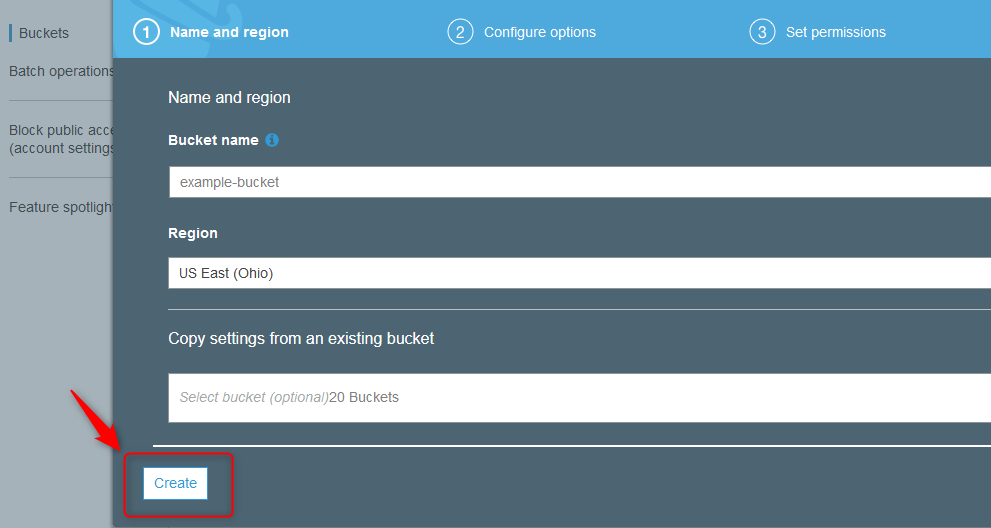
In the Bucket name field, type a unique name for your new bucket.
*The name must be unique across all existing bucket names in Amazon S3.
For Region, choose the Region where you want the bucket to reside.
Click on Create.
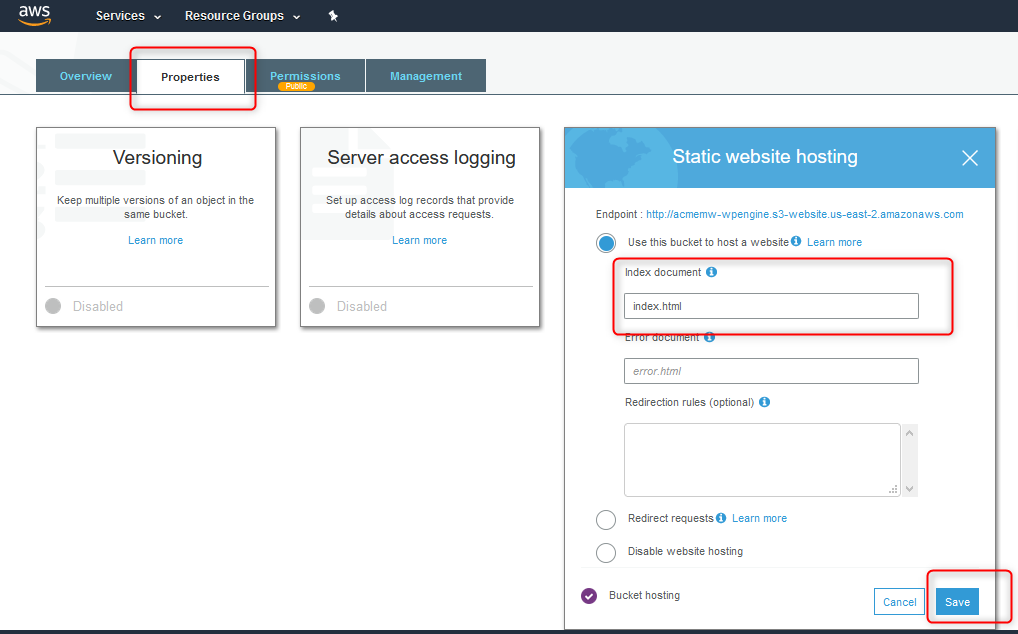
Step 3 : In the Bucket name list, choose the name of the bucket and Click on “Properties”
In “Static website hosting”
Select “Use this bucket to host a website” and enter “index.html” in Index document
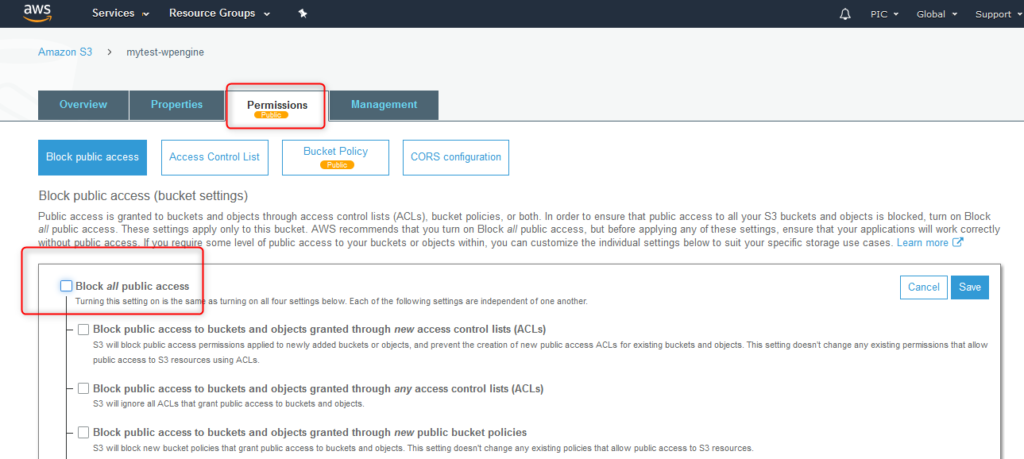
Step 4 : Click on “Permissions”
Select -> “Block public access”
Uncheck “Block all public access”
Step 5 : Select “Bucket Policy” Tab
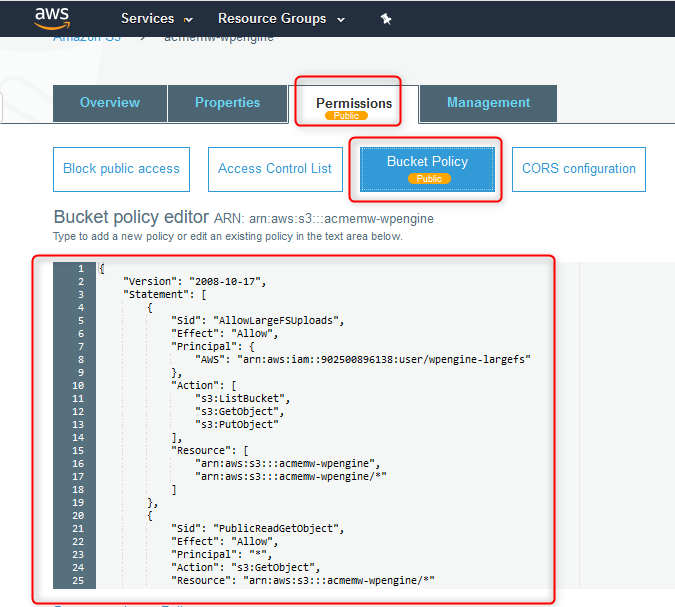
and add the following code :
{
“Version”: “2008-10-17”,
“Statement”: [
{
“Sid”: “AllowLargeFSUploads”,
“Effect”: “Allow”,
“Principal”: {
“AWS”: “arn:aws:iam::902500896138:user/wpengine-largefs”
},
“Action”: [
“s3:ListBucket”,
“s3:GetObject”,
“s3:PutObject”
],
“Resource”: [
“arn:aws:s3:::xxxxxxxx-wpengine“,
“arn:aws:s3:::xxxxxxxx-wpengine/*”
]
},
{
“Sid”: “PublicReadGetObject”,
“Effect”: “Allow”,
“Principal”: “*”,
“Action”: “s3:GetObject”,
“Resource”: “arn:aws:s3:::xxxxxxxx-wpengine/*”
}
]
}
NOTE – Change the name from “xxxxxxxx-wpengine” to “your-bucket-name”
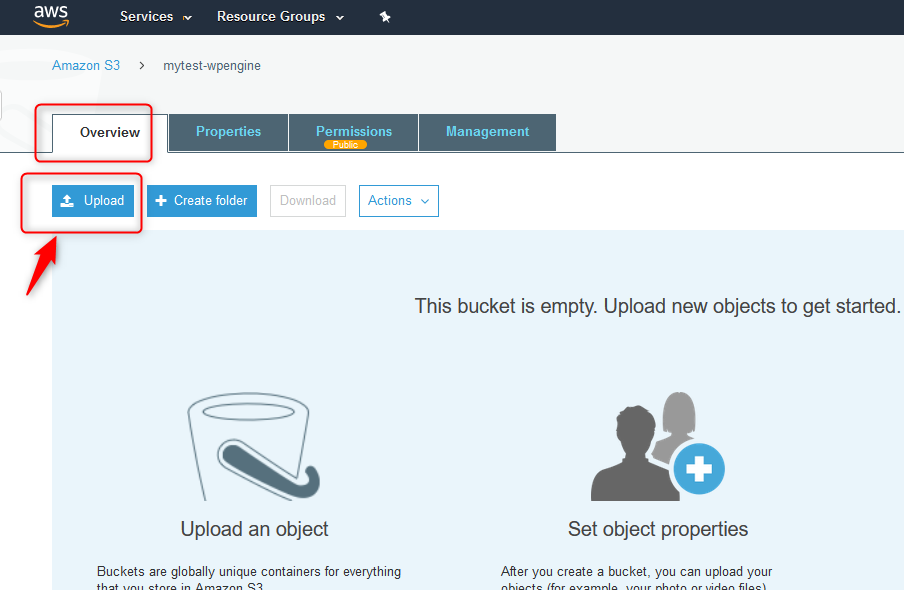
Step 6 : Select “Overview” Tab
Upload a “341750cd.largefs” file if you are transfering site content from shared server. Download file here.
Upload a “4bd5d918.largefs” file if you are transferring site content from a dedicated server. Download the file here.
Step 7 : After performing all the above steps you have to contact WPEngine and give them a bucket name and bucket region so that they can move the site content to AWS.