
We introduced a Multi-Wishlist feature for Columbus Supply. Here we will share with everyone at PIC how the plugin program “YITH” helped us create it.
First, enable general settings within YITH including enabling Wishlist for All Users and enabling Notices.
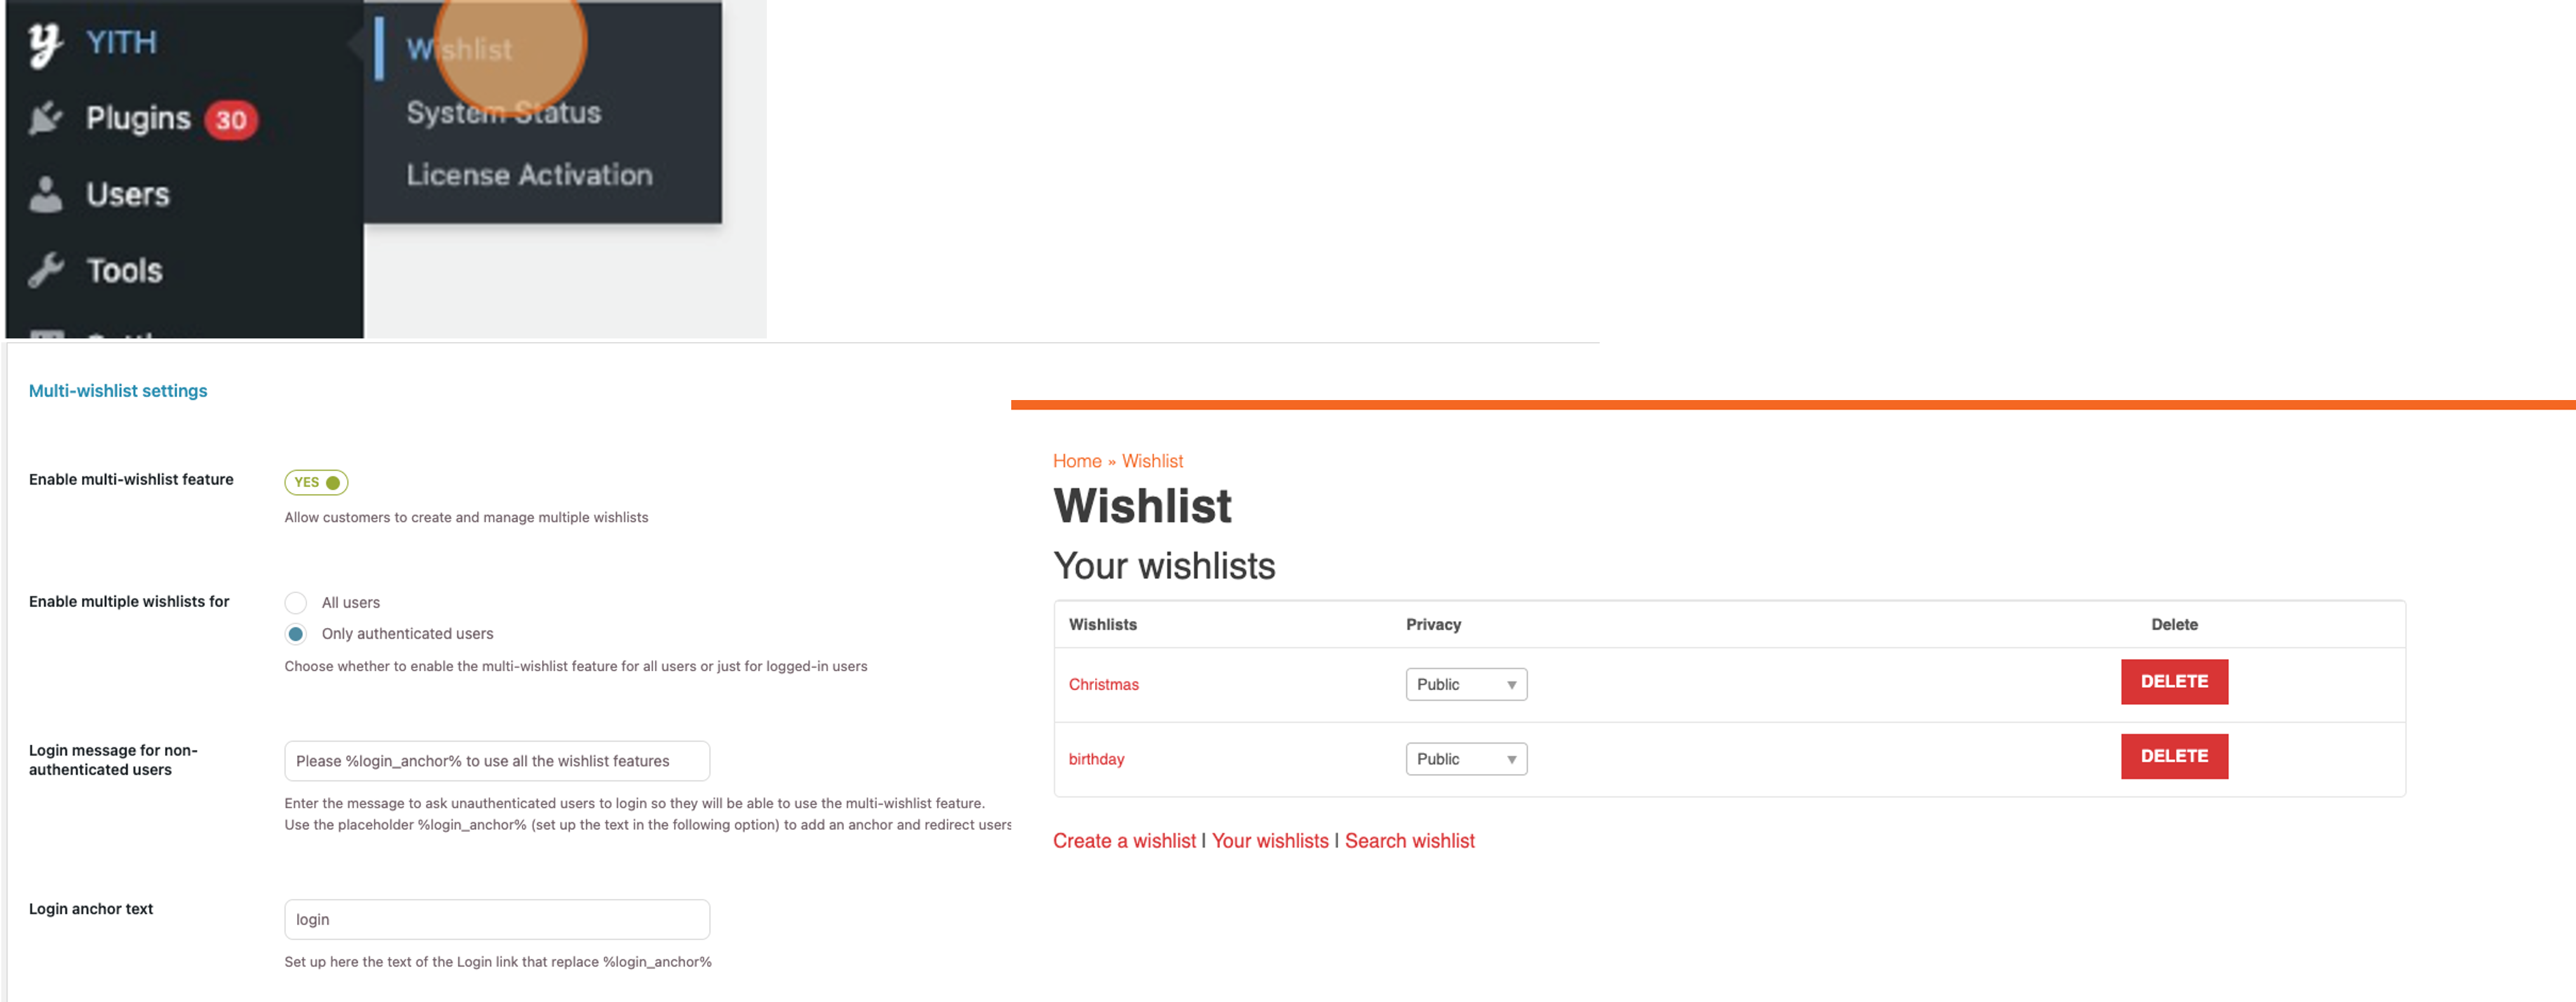
The Multi-Wish list feature allows users to create and sort multiple wish lists.
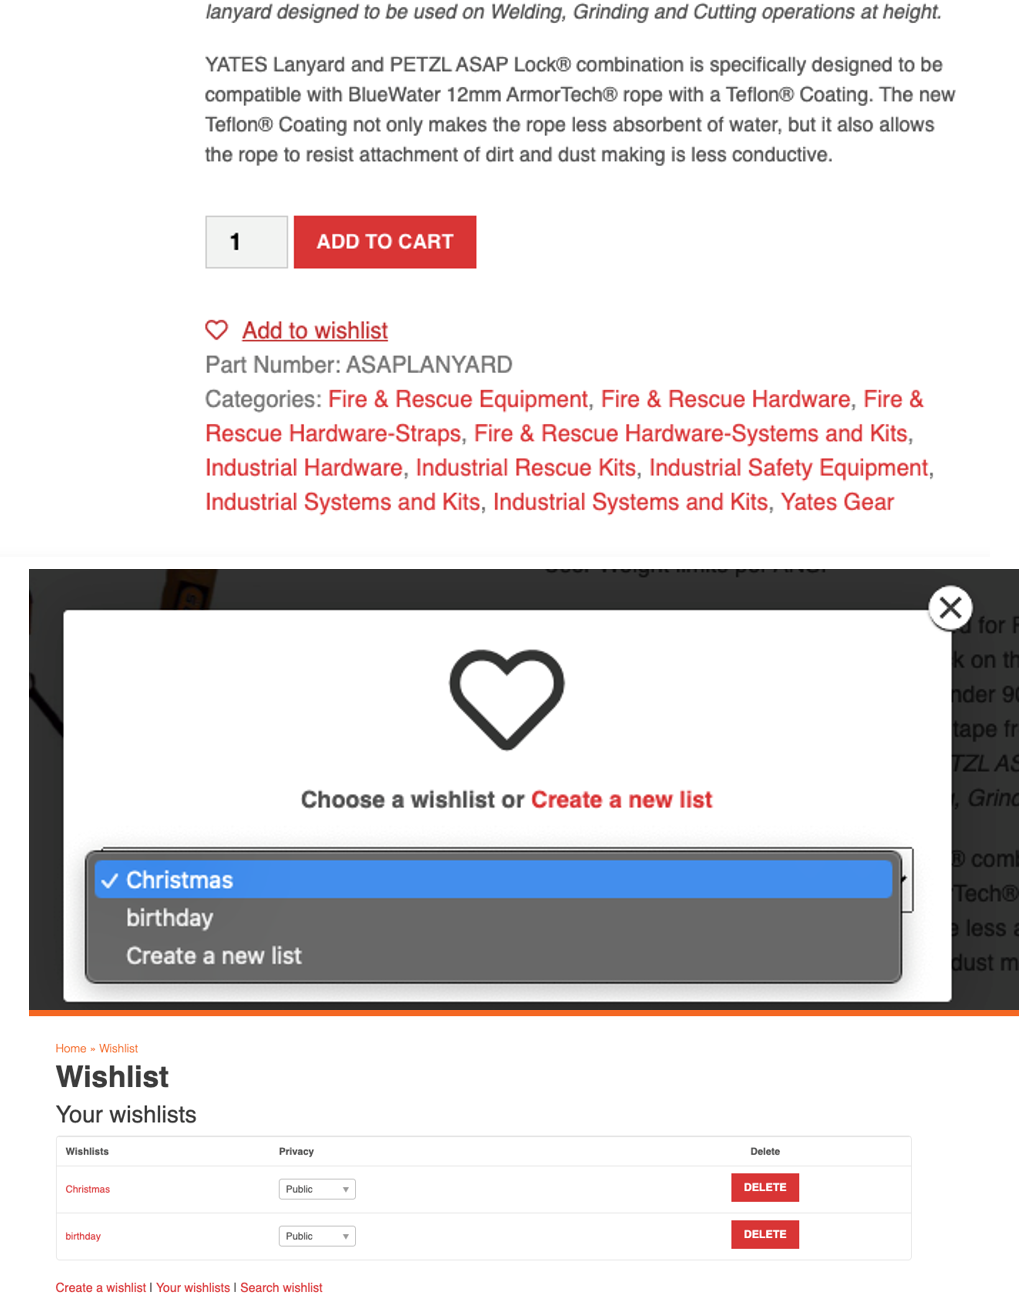
When you turn this on, and click the “Add to Wishlist” button, you will see an option to select which wish list you want to add the product to, with an option to create a new list as well.
On your “My Wish List” page, you can see the multiple wish lists that have been created. Here, users can edit these lists, and add items to cart.
There are a few “Add to Wishlist” Options available:
- Appearance options when a product is added to wish list
- Loop Settings
- Custom Text Options
- Style, Color, Icons
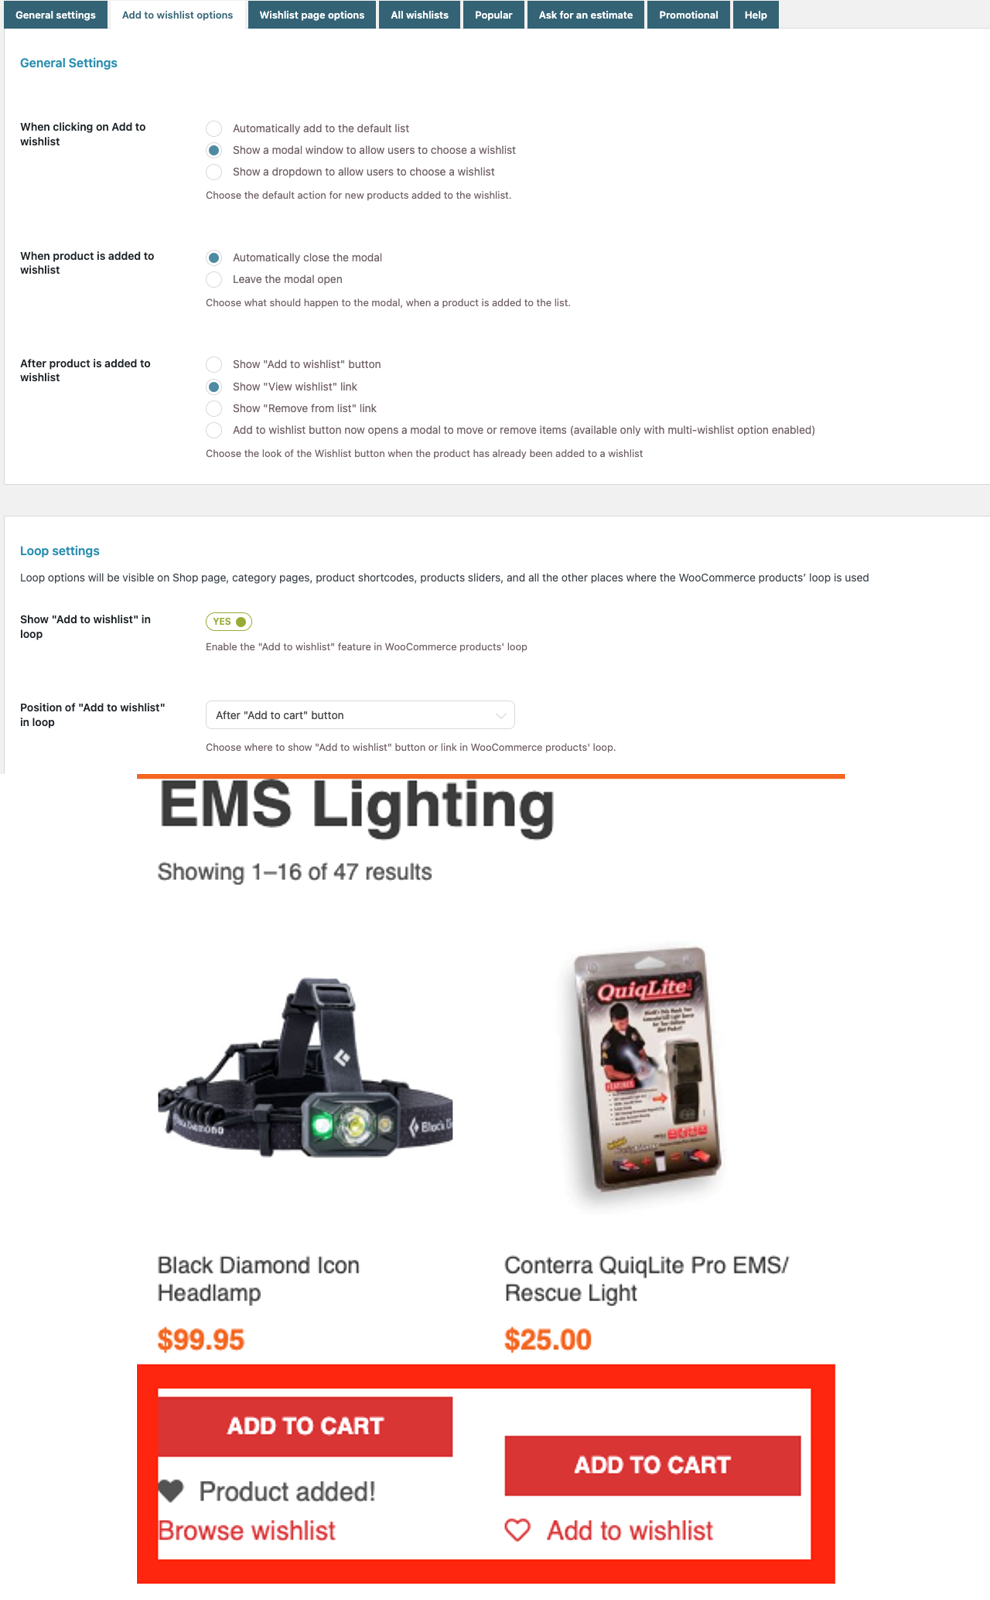
Loop Settings will need to be turned on so that the “Add to Wish List” button will show on Shop pages, category pages, product shortcodes, sliders, etc. Otherwise, the add to wishlist button will only show on the specific products page.
You can select to show this button before or after the “Add to Cart” button, or it can be on top of the image.
We also have Wishlist Page Options:
- Edit and set the page where customers wish list will be
- Layout options
- Sharing options
- Social Media options
- Text, Style and Color of Wishlist Landing Page

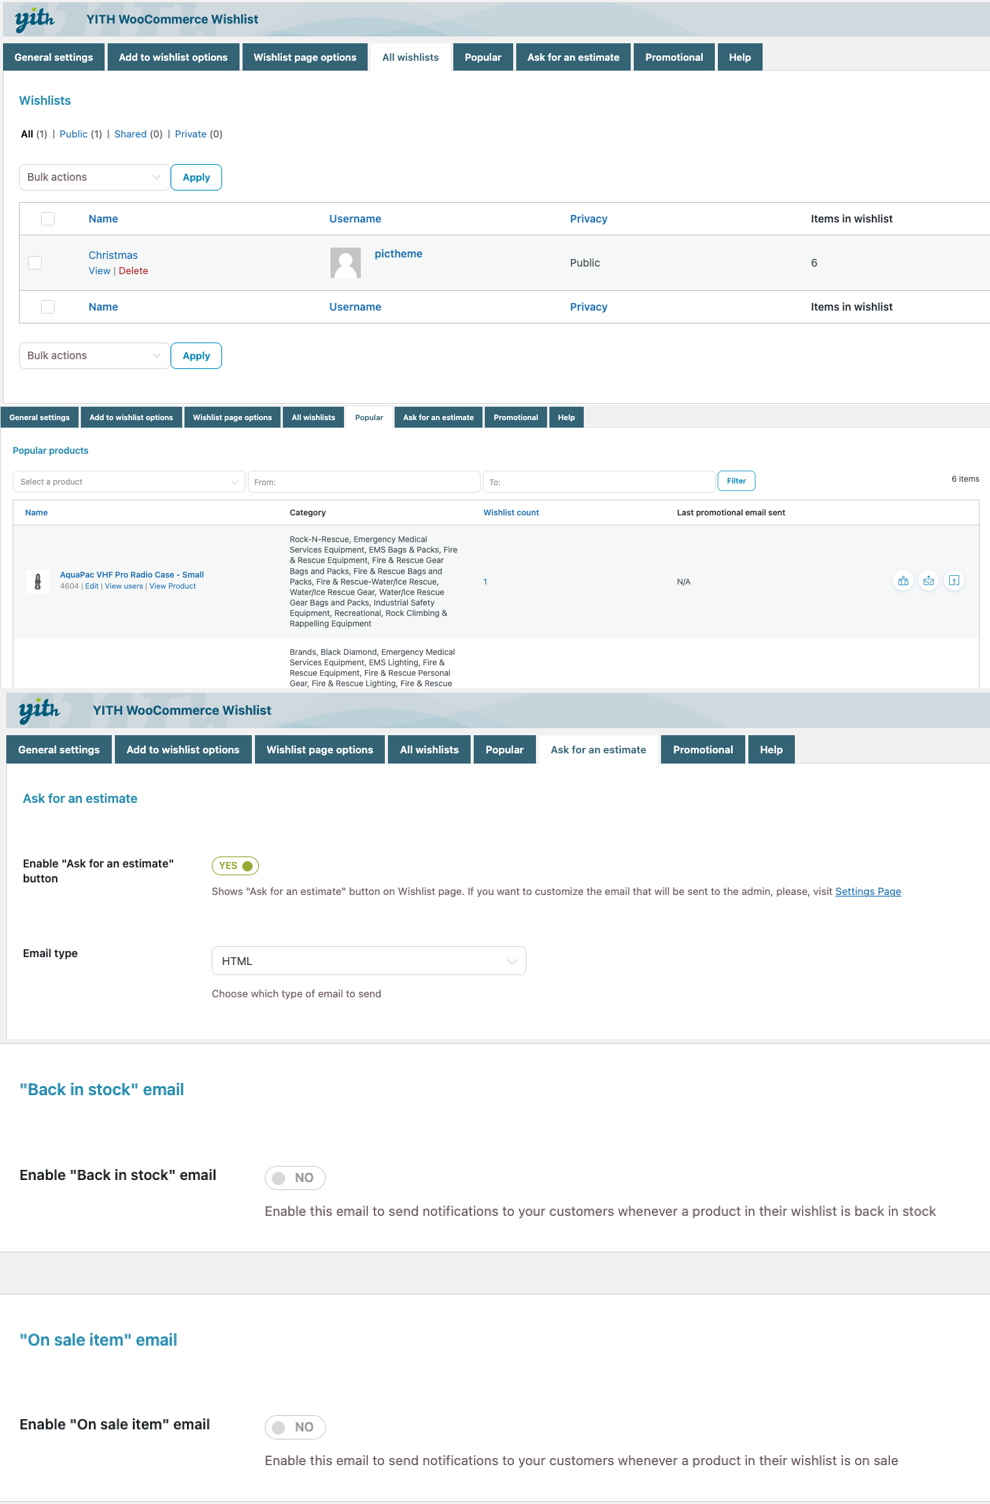
There are also ways to use wishlist data for analysis on products. For example, looking at “All Wish lists” provides a list of every user along with the name of their wish list and the number of items in each list. You can sort products by popularity or how often the items are in a person’s wish list.
Enabling the “Ask for an estimate” button on Wishlist page allows for the user to check how much everything in that wishlist would cost if moved to the cart. You can also use the “Promotional” options to decide whether to email users when an item in their wishlist is on sale or back in stock.
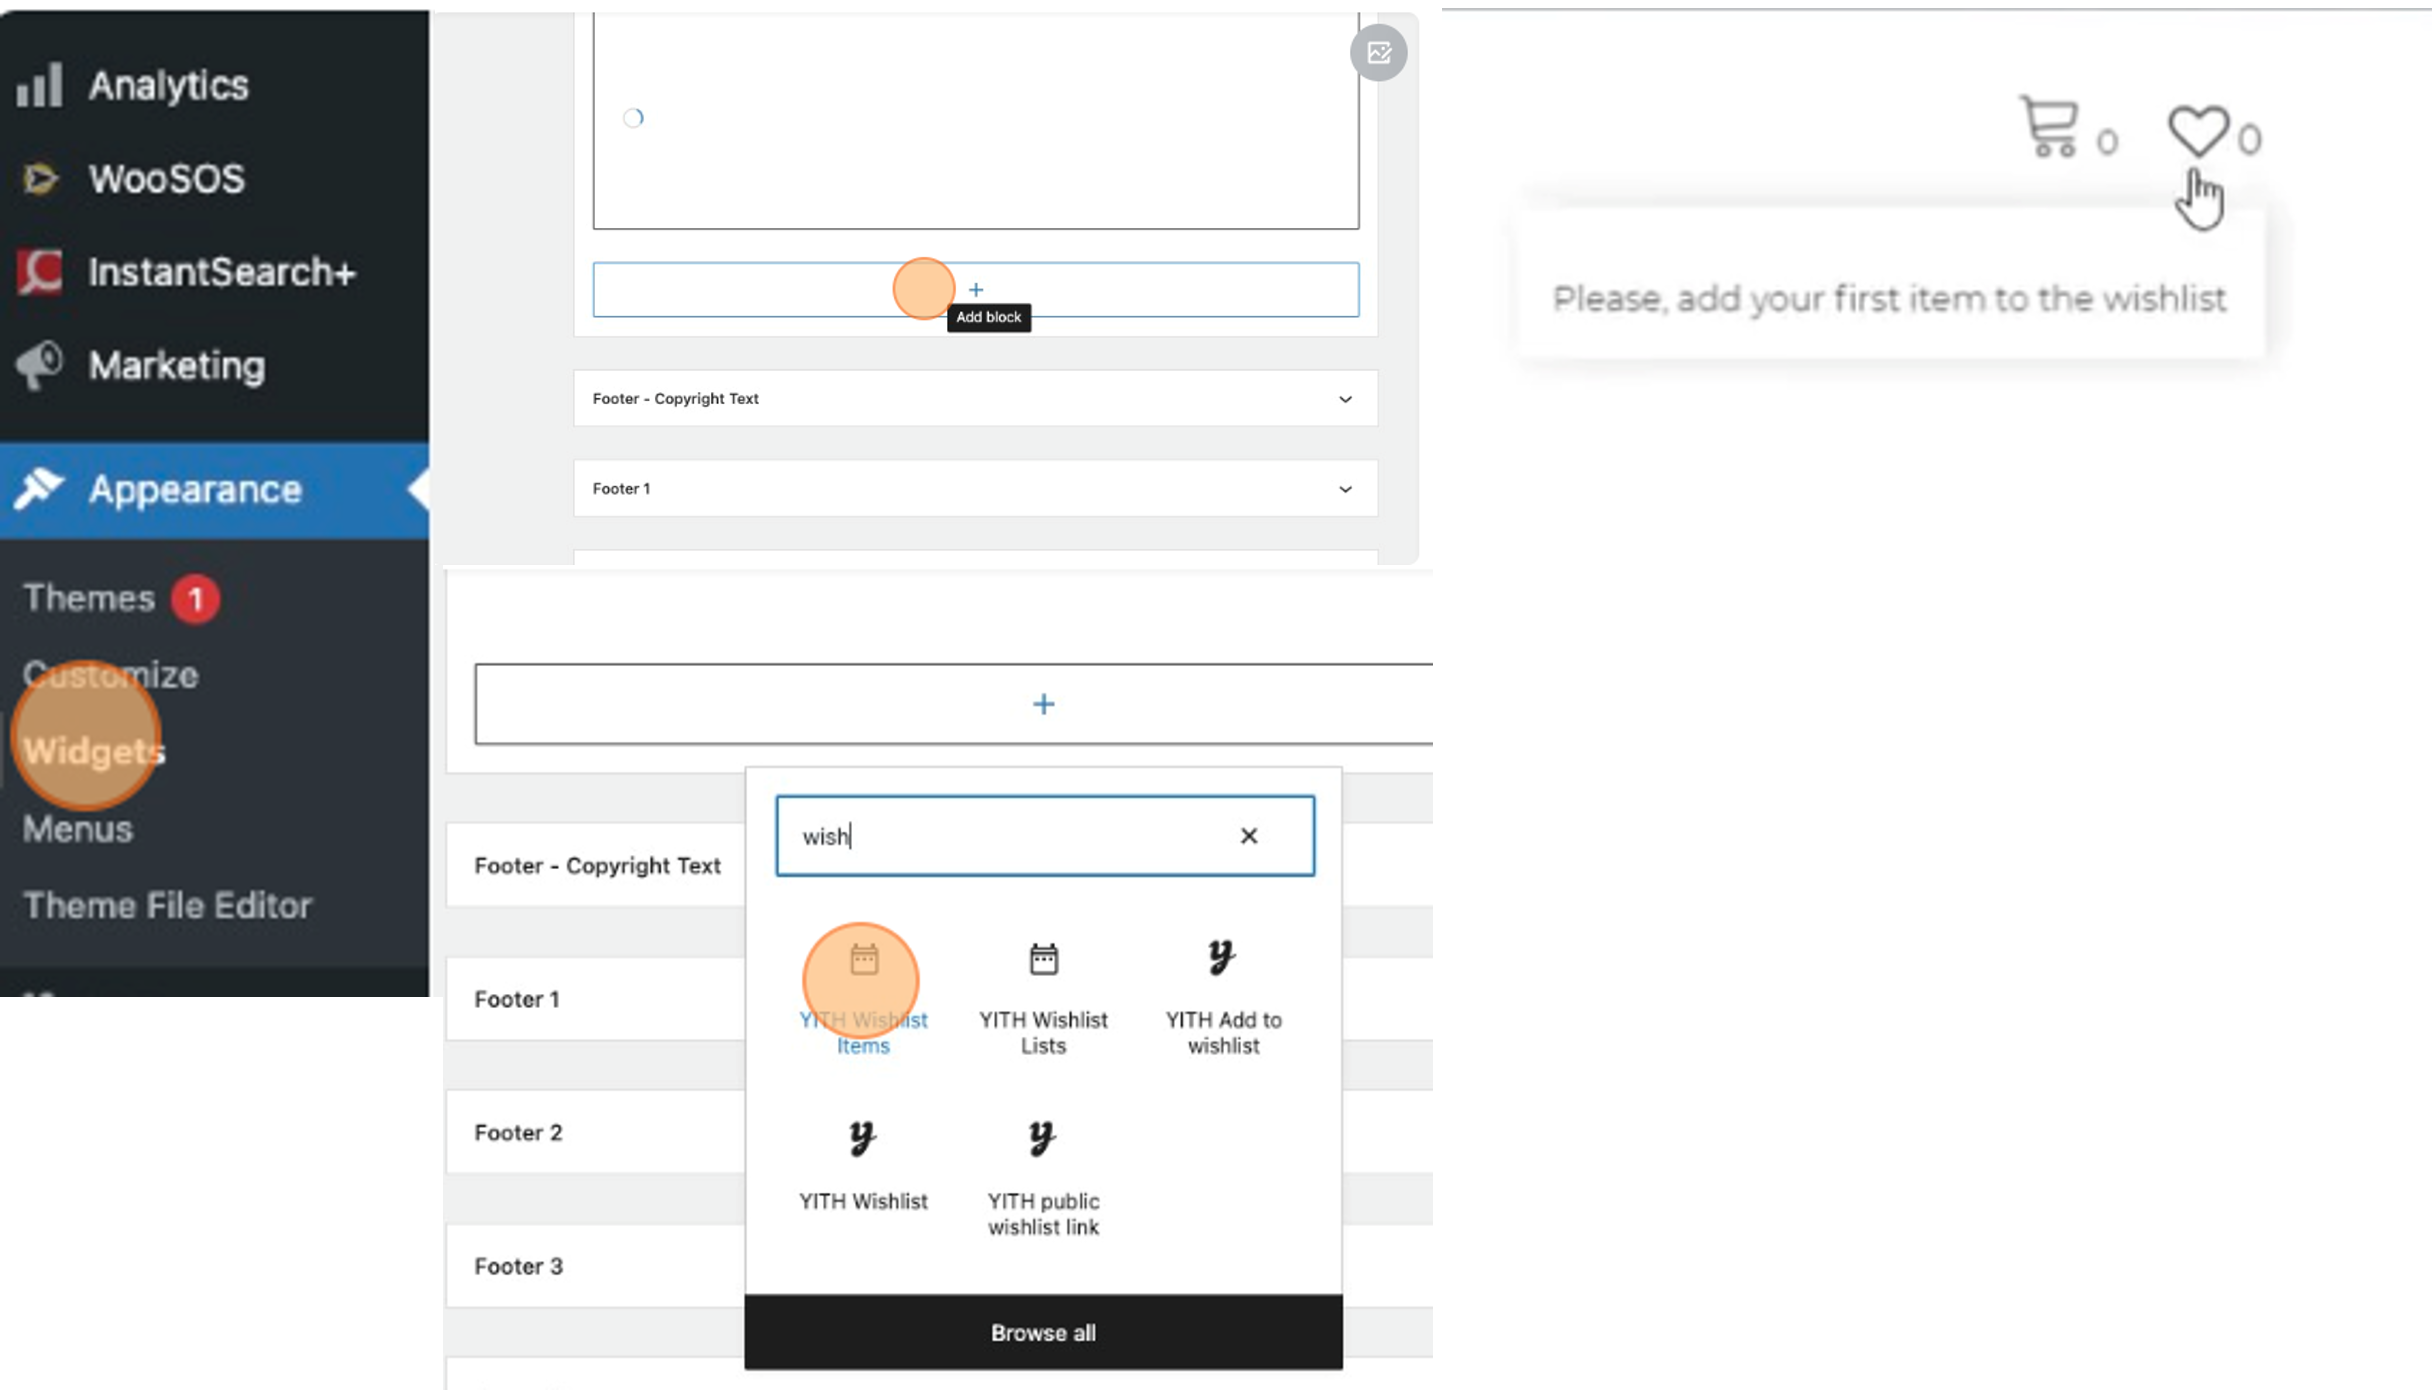
Now, you are ready to add the Widget to Page. Go to “Appearance”, then “Widgets”. Select where you want to add the “Wish List” button and select the “+”. Start to type “wish list” and you should see different options for how the Widget should appear.
- “YTH Wishlist Items” shows all the items in a wish list.
- “YTH Wishlist Lists” which will list the multiple lists created.
- “YTH Add to wishlist” is a small button that will add the product to the wish list when selected.
You can edit this button in “Add to wish list options”.